|
|
|
|
|
|
|||
|


|
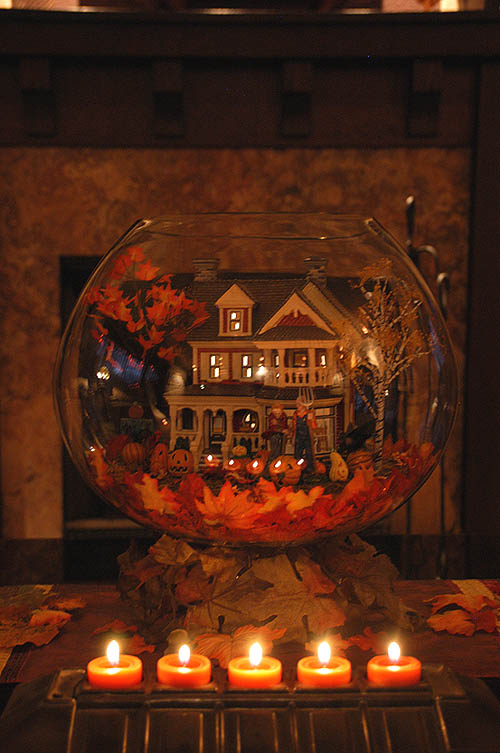
To begin, just follow along with the photos that describe the steps for creating this fall vignette inside a large glass piece.
To start, this particular design is working with a large brandy glass piece that measures 16 inches wide by 15 inches tall. For more information
on obtaining one of these pieces send the club an email. First, create a pattern pattern from
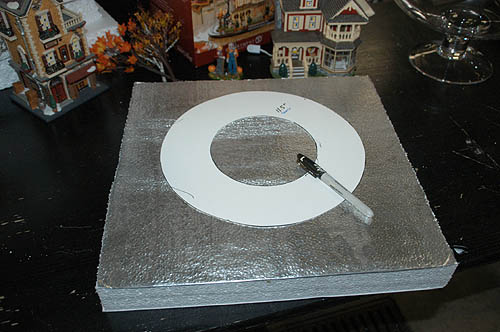
a large poster board. Draw an 11.5 circle and then draw 6" circle inside the larger one (as shown on the left side of the photo below).
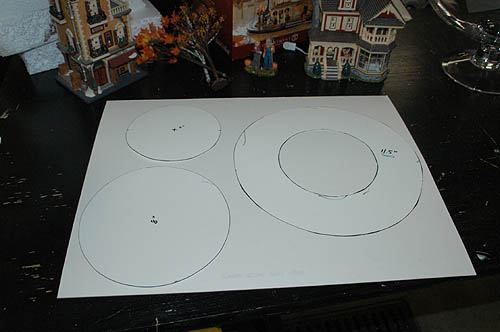 Next, cut out the pattern with a pair scissors and using a handheld xacto knifve cut out the 6 inch concentric circle drawn in the middle. This will serve as your pattern for several steps and future displays.
 Using the pattern, trace onto 2 inch (insulation type) styrofoam available from any major home improvement center.
 Using a handheld skill saw, cut out the larger circle from the styrofoam.
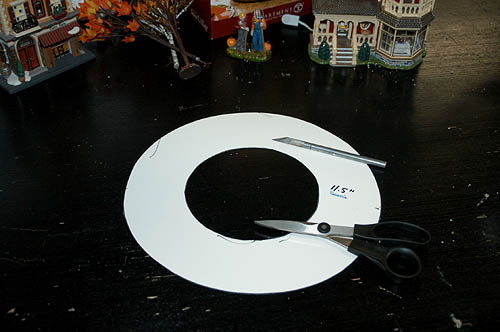
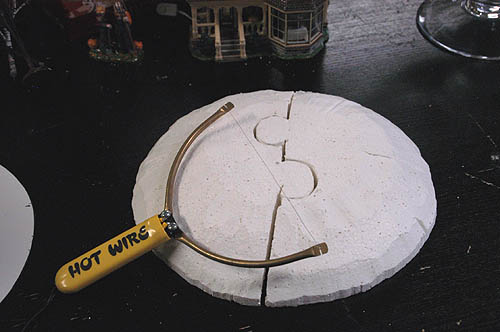
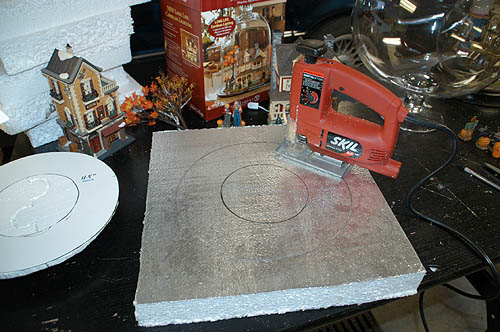 Next, draw a line across the diameter of the larger circle and within the 6 inch smaller circle draw two "jigsaw puzzle" style circles.
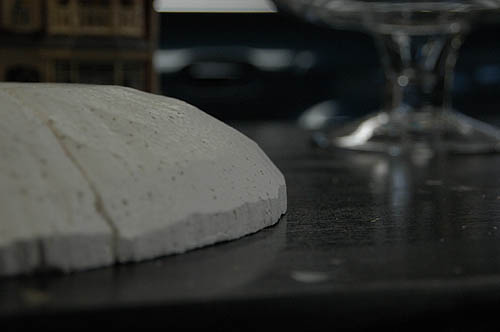
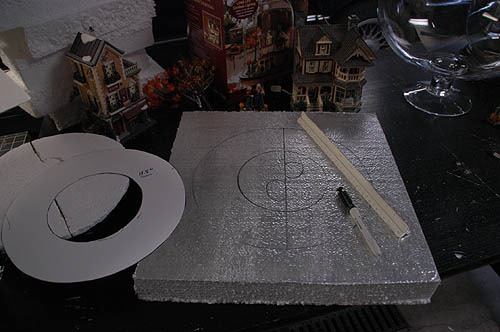 Using some type of hot wire, trim the shape of the 11.5 inch circle to resemble shallow bowl shape. Use the inside marked circle and the outer circular shape as yoru guides.
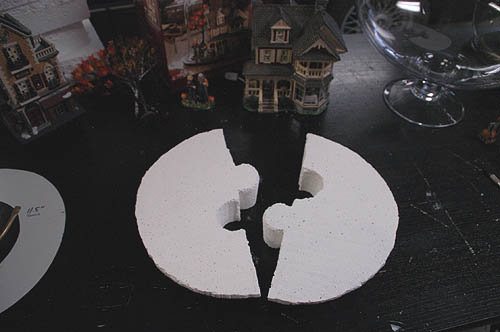
 Using a handheld skill saw or hot wire, cut the cirle display base into two separate pieces that form an interlocking "jigsaw" as show below.
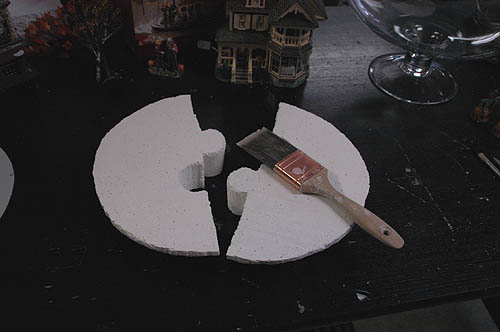
 Next, using latex household primer and a 2 inch brush, give the display base a nice coat of paint to protect and strengthen the styrofoam.
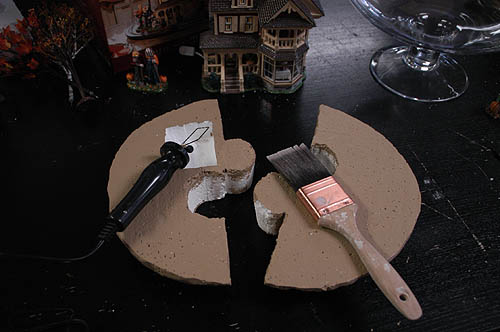
 Once the primer coat is dry (about 23-30 min), paint the display base any color you like using a latex household paint. Considering this is a fall scene we have painted the display a neutral light brown. Additionally, if you choose to use a lighted accessory, this is a good time to excavate out a place for the battery box using Department 56's village foam cutter (#52847).
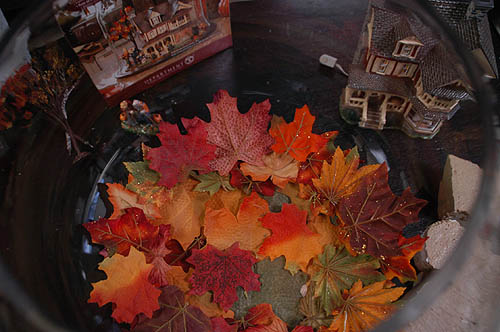
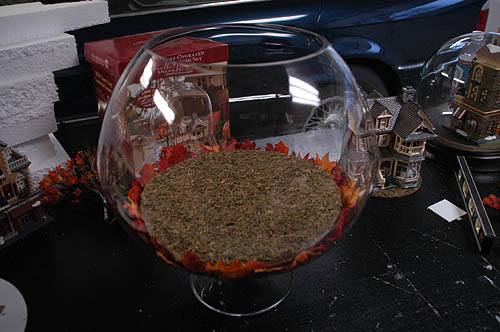
 Now you are ready to assemble the vignette. Be sure that your glass piece is clean. Begin by placing silk leaves of various colors and types in the bottom of the glass piece. Arrange them carefully so that the good side is facing down or outward and that they cover the complete bottom as shown below.
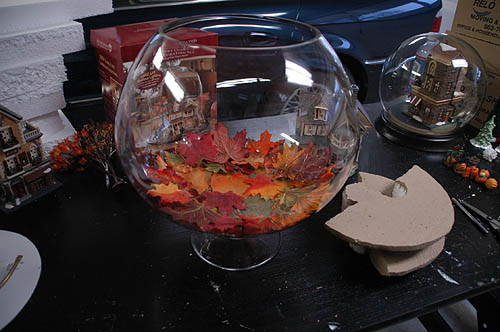
 Next, place one of the styrofoam pieces carefully in the glassware and then add the second half and join together.
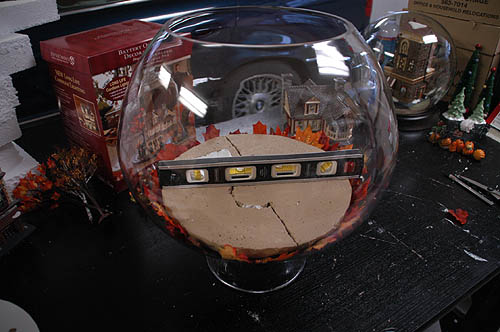
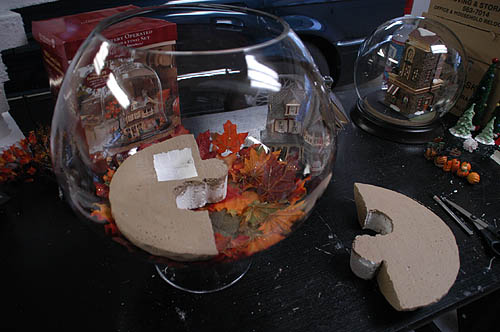 This is a good time to make sure that the assembled base is level.
 Utilizing the pattern prepared earlier, cut out a circle of moss using Department 56's Village Roll of Moss (#53052) and place it on top of the display base. There is no need to glue or tape this in place as the weight of any building and accessories will hold it in place.
 Carefully insert the lit building with "display anywhere" lighting already to operate into the glass piece.
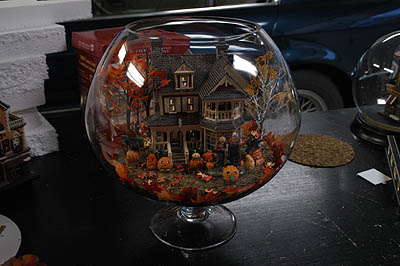
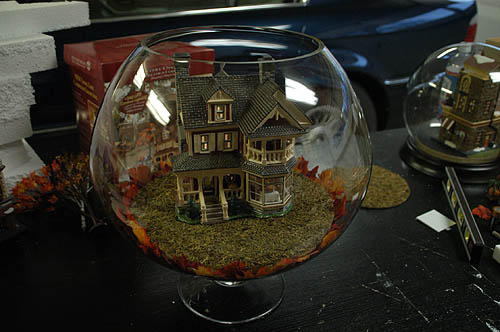 Finally, insert trees and accessory pieces. To enhance the fall look, scatter small silk leaves on the moss cover to enhance color & texture. Small leaves were included with this lit piece, but additional ones can be found at most craft stores.
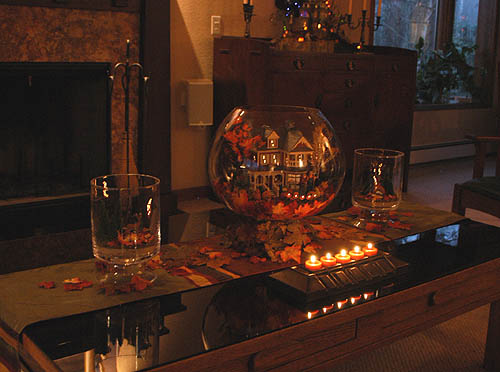
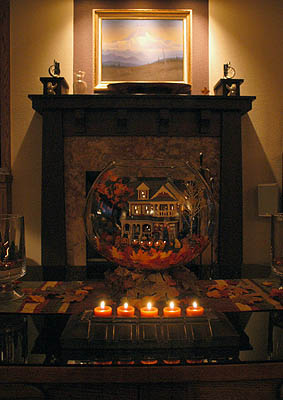
 Next arrange your newly constructed vignette in a prominent place in your home. Enhance it's appeal by adding a table runner, additional leaves and candles. Additional fall vignettes, featuring trees and woodland animals were created in smaller glass hurricanes to enhance the main display. These smaller vignettes were then placed around the larger scene.
|
||||||
| Copyright 2002,
Arctic 56 Collectors Club, Anchorage, Alaska Last Updated October 28, 2006 |
Department 56, Copyright, Department 56, Inc., Eden Prairie, Minnesota |