(click to enlarge)
|
Wacky Lassie |
(click to enlarge) |
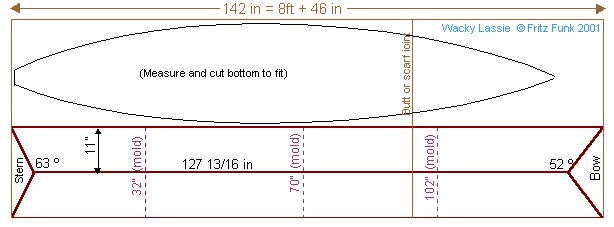
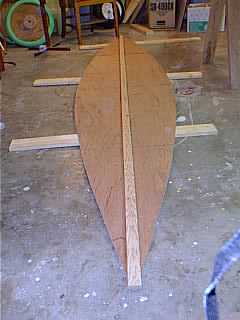
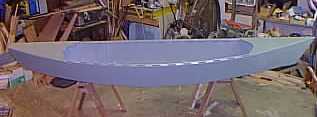
This boat is designed to be quickly built by kids using modified Bolger/Payson "tack & tape" construction methods, with techniques that minimize the use of hazardous materials, and maximize suitable children's skills. Kids love these boats, and I've found they learn to control double-paddles much more quickly than a single canoe paddle. She's roughly dimensioned after the Rushton Wee Lassie of 10.5 feet. However, the Rushton Wee Lassie has a plumb stem - this boat preserves the Wee Lassie dimensions along the water line of her rockered flat bottom, but her bow and stern overhangs extend the LOA out to 11.5 feet. The name is derived from the brightly colored wacky noodles (the foam children's swimming toy, which I believe should be an essential component of any boatbuilding shop!) which are glued to the gunwales and provide flotation. I will be building the prototype, working by myself, over the next few days to prove the concept, and will update this page frequently as construction proceeds. The plan is to build a couple more with a group of kids a few weeks from now. I used Robert Laine's Carene 5 software to fine tune the rocker and displacement for the intended load of a 60 to 90 lb child. The 24 inch beam at the chines ought to be about right, based on Michalak's Piragua, O'Brien's 6 hour canoe, and my own experience with the one sheet double paddle canoes. I constrained the design to straight side panel layouts to speed and simplify marking the panels with kids. The 73 degree flare produces the rocker needed for the intended displacement in order for the chin of the stem and the heel of the stern to emerge a sufficient distance with the design load of one child. It's still a ways off from the balanced rocker and side panel curves which Bolger espouses in order to minimize turbulence, but I want to keep the draft ultra-shallow for a specific application in very shallow water.
(Note: fore and aft molds are 16 inches on the bottom. Transom bottom is 2.5 inches; transom top is 5 inches - can be adjusted by eye, or built double-ended. External chine log version works far better for building with kids!)
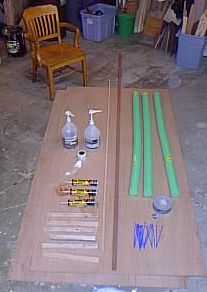 Here's the materials she'll be built from (11 pm Saturday July 17):
|
|
| July 18, 1999, Day 1 (3 hours): assemble molds, cut out and butt splice sides, tack sides to midships mold: | |
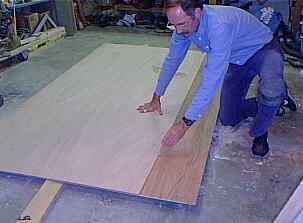
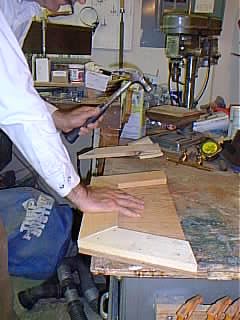
Laying out the simple straight-sided side panels. Factory edge from the first side makes a good straightedge. |

Cutting out the side. 2 by stock under panel allows for saw blade clearance. |
Lay tombstone(transom) on side panel to bore stitching holes, aligning the inside (shorter) bevelled edge of tombstone with unbevelled bottom corner of side. |
Sides tacked to midships mold. Ended up using Gorilla glue for butt blocks, not PL premium. |
Nylon wire ties used for stitching (blue!), draw bow together. Gentle curves, no Spanish Windlass needed here, just hand hold. |

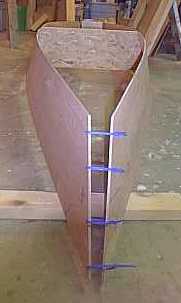
Tacked together - its a boat! Sure like the stitching for easy of pulling together at this stage! |
Stern View. Quitting time for Day 1 (3 hours). |
|
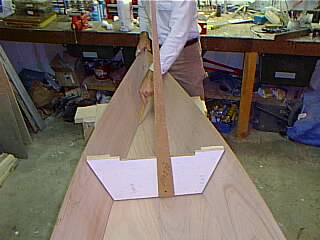
| July 19, 1999, Day 2: Make fore and aft molds, rough out bottom (2 hrs.) | |
Making fore and aft molds from scrap.... |
Fore and aft molds in place, with alignment sticks for twist along centerlines. |
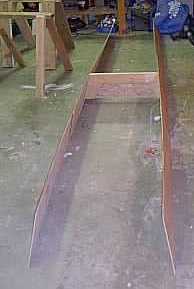
Bottom is slipped under right-side up boat for marking, saw horses forming the bottom rocker sufficient for rough cut. |
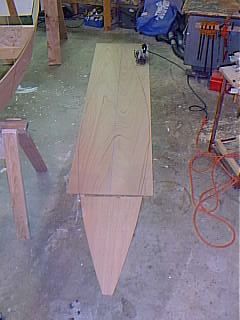
Rough cutting the bottom panels (not yet spliced), just outside the outer plank line. End Day 2 (2 hours). |
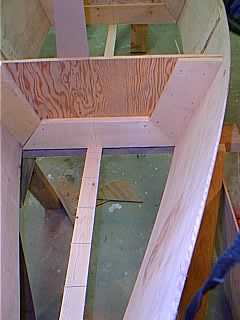
| July 20, 1999, Day 3: complete and fillet bottom | |

Clenching butt block nails: 3/4" bronze ring nails clench nicely thru two 1/4" plys. Nailing thru cardboard before a backing block allows the ringnails to release easily. I found they clenched over fine just laying the heads on concrete (no bucking iron needed). |
1x2 keel is pre-installed on bottom. |
Good idea to test bend the keel first to see if pre-installing will work. If it won't take the rocker, shallow relieving cuts will help (horizontal stripes). |
Bottom tacked to molds, some additional stitching (nylon cable ties) and clamps used to draw bottom up to sides, Bead of PL Premium applied to chine, then 2" 8 oz. glass tape pressed into fresh PL Premium. |
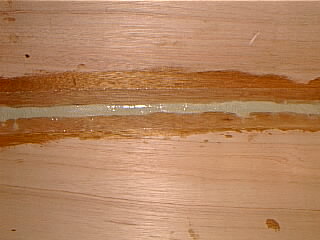
Finished joint with epoxy saturated glass tape over PL Premium. This is an experiment - we'll see how this holds up. In tests of this joint it was very strong, wood always failing before the adhesives. I think with the kids though I will revert to external chine logs, of dimensions that we can pre-install. |
|
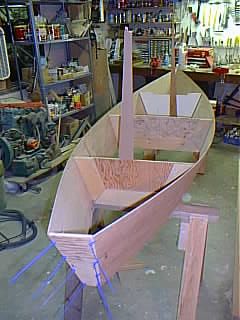
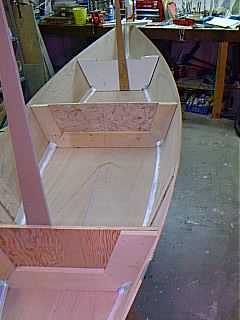
| July 21, 1999, Day 4 (4 hours): Decks, inwales, outside seam glass/epoxy | |
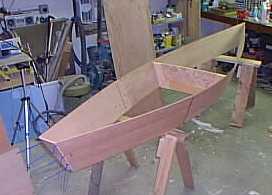
fore and aft decks cut out and on, inwales clamped. |
quick inwale setup. |
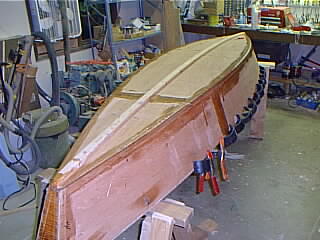
chine, stem, transom outsides glassed. | |
| July 22, 1999, Day 5 (3 hours): Beefed inwales, sand, paint | |
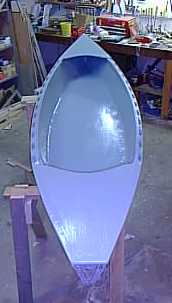
Painted "Dartmouth Green" Leftover solid oil base house stain, 1 coat coverage, no primer. |
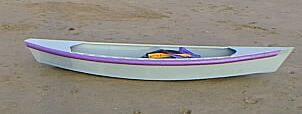
She's done! (except for the wacky noodle gunwales) Tomorrow is Hmmmm....this was not part of the design goal, but this design has led me very close to the Mississippi River duck hunting skiff I wanted to replicate "someday"! |
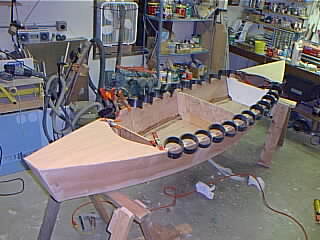
| July 22, 1999, Launch Day (1/2 hour): Install "Wacky Noodle" Guards. Launch!!! | |
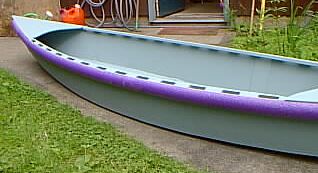
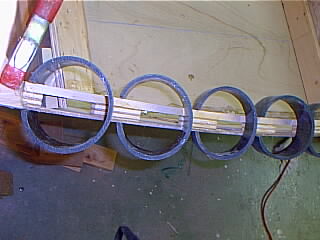
Joe chose purple Wacky Noodles (ripped in half on bandsaw), to go with the "Dartmouth Green" leftover house stain. Weldwood contact cement works well for this material. |
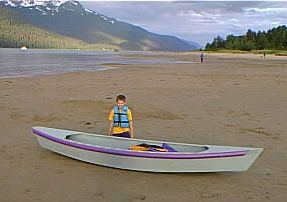
Completed "Wacky Lassie" at Juneau's Sandy Beach, for Macinko's going away party. |
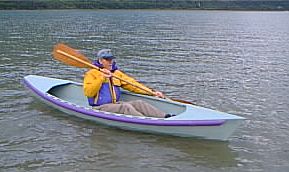
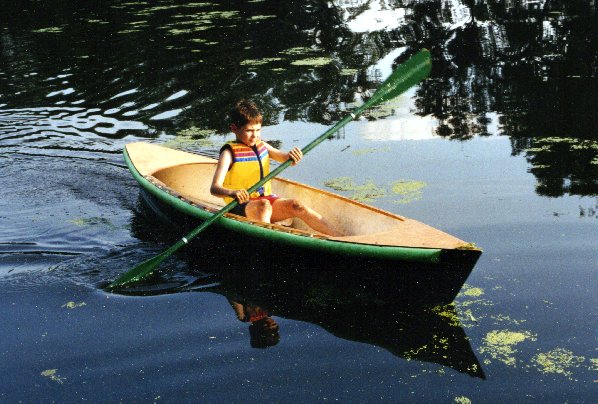
Phil Rigby (grownup) takes her for a spin. A little down on her lines. With Joe (65 lbs) she looked just right. Joe says "it rides the waves nice"!! |
|
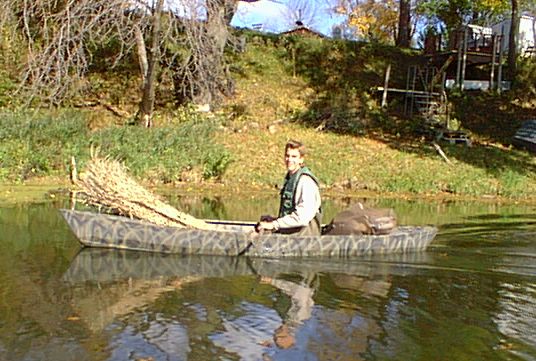
Update....Hull#4 is now underconstruction. Methods modified to external chine log, as it has proven easier for the kids to build. Ben Tippets (15) built this version, without the wacky noodles, and set it up for duck hunting in Wisconsin. More on all this later!!! | |
Contact: Fritz Funk (fritzf@alaska.net)